Dental CT View

- Description
- Login Screen
- Scans List
- Screenshots
- Panoramics and Cross Sections
- Implant Centric Images
- 3D Views
- Stereo Views
- Feedback
Description
Dental CT View is a Dental CT and CBCT Viewer compatible with iPhones, iPads and iPods. It is optimised for pre-viewing dental computed tomography (CT) and cone beam CT (CBCT) scans and treatment plans associated with dental implants, on your iOS device.
Dental CT View is not a medical device and is not suitable for primary diagnosis.
Dental CT View displays images which are pre-computed using CE-marked radiological workstations and delivered to your device for convenient and rapid viewing.
Dental CT View protects patient data using an encrypted file transfer process which requires a password to prevent unauthorised access. This gives you secure wireless and portable access to your patient’s images and treatment plans wherever and whenever you need to view them.
Dental CT View is specifically designed for dentists to demonstrate treatment proposals to their patients, providing panoramic, cross section and 3D viewing in a convenient and intuitive format.
You can try Dental CT View using the demo account, which contains anonymised patient data - just clear the Login and Password, and tap View Scans.
Login Screen
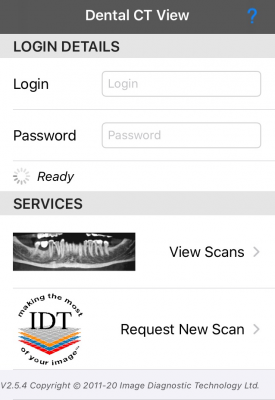
Enter your secure login details and tap View Scans to list and download your CT/CBCT scans. The app will remember your Login so you need only enter your Password the next time you launch Dental CT View.
- Existing sFTP users - Please enter your sFTP Username (Login) and Password. If you have forgotten these details please contact us.
- First Time users - If you do not already have an sFTP account with IDT Scans please contact us.
- Demo users - If you would like to try Dental CT View without registering please clear the Login and Password fields, tap View Scans, and you will be transferred to a demo account containing anonymised patient data.
Services
- View Scans - Tap to check for new scans or view downloaded scans offline.
- Request New Scan - Tap to arrange a new CT/CBCT scan or reformat an existing CT/CBCT scan to make it suitable for viewing in Dental CT View.
- Help - You can access these Help pages using the blue “?” icon at the top right of every screen.
Scans List
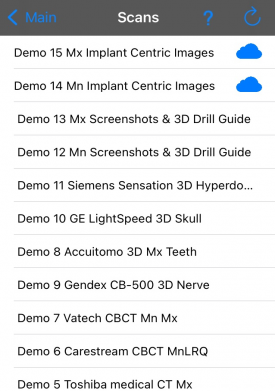
- Scans List - Here you will find a list of new CT/CBCT scans ready for downloading, as well as downloaded scans ready to view. To view a scan please tap the filename (which consists of Patient Name, Scan Date, and Region Scanned). If the scan shows the blue cloud icon it will be downloaded to your device before viewing. A downloaded scan will remain on the device and can be viewed offline at a later date.
- To delete a scan from your device - please swipe across the filename (from right to left) and tap “Delete”. As long as the scan remains in the cloud it may be downloaded again.
- To refresh the list - please tap the “Refresh” button at the right of the Title Bar.
- To return to the Login Screen - please tap the “Main” button at the left of the Title Bar.
Screenshots
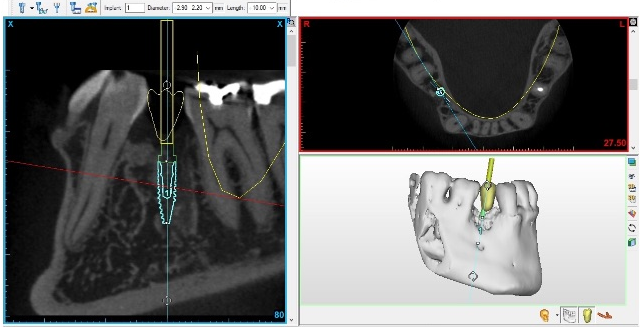
Dental CT View may be used to display a “Gallery” of images captured from dental implant planning software such as Anatomage InVivo Dental or Simplant.
- Next Image - swipe right to advance to the next image in the gallery.
- Previous Image - swipe left to go back to the previous image.
- Return to Scans List - tap the “< Back” button (top left hand corner) to go back to the list of scans.
Zooming the screenshots
- Use the pinch gesture on the screenshots to zoom in or out. Double tap swaps between the zoomed and un-zoomed image, and back again.
- Pan magnified screenshots by dragging with one finger (use two fingers in 3D mode). Double-tapping with one finger resets the zoom and centres the image.
- Rotate your device through 90 degrees (while holding it upright) to display the screenshots in Landscape mode.
Fast forward or reverse
- Tap the bottom of the screen to bring up a self-hiding tool bar for fast navigation through the screenshots.
- Tap “<<” to navigate to the first screenshot and “>>” to navigate to the last screenshot.
- Tap “<” or “>” to single-step through the screenshots.
Panoramics and Cross Sections

Dental CT View can display a sequence of Cross-Sectional images, together with the Panoramic to which they are related. Tap the icon at the top of the screen, to the right of the filename, to display these images.
You can navigate through the Cross Sections as follows:
- With the Blue Line - by moving the blue line on the panoramic image you can adjust the cross-section slice to match the corresponding position on the panoramic image.
- With the Blue Arrows - you can step to the next cross-section image (left or right) by using the left and right arrows on the bottom toolbar.
- Return to Screenshots - tap the “< Back” button (top left hand corner) to go back to the gallery of screenshots.
Zooming the images
- Use the pinch gesture on the cross-section image to zoom it in or out. Double tap swaps between the zoomed and un-zoomed image, and back again. The same gestures can be used on the panoramic image when in full screen mode.
- Pan magnified 2D images by dragging with one finger (use two fingers in 3D mode). Double-tapping with one finger resets the zoom and centres the image.
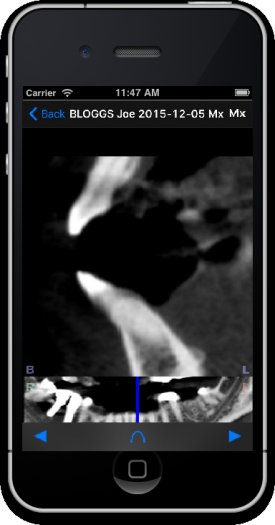
Full screen panoramic image
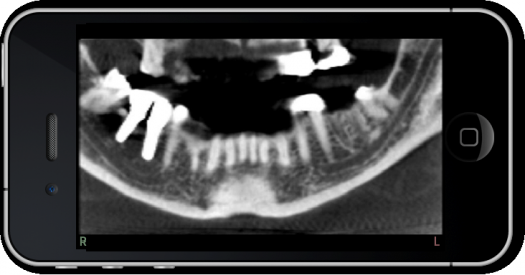
- Landscape - Turn the device into a landscape orientation to activate a full screen panoramic image. This image can be zoomed and panned using the same gestures as for the cross-section images. Rotate the device back to a portrait orientation to exit the full panoramic mode (or tap the “<” button).
- The Pan Button - Located in the middle of the bottom toolbar, this will switch the screen to a full screen panoramic when tapped. The full screen panoramic image can be zoomed and panned as with the cross-section images. Rotate the device back to a portrait orientation to exit the full screen panoramic mode (or tap the “<” button).
Implant Centric Images
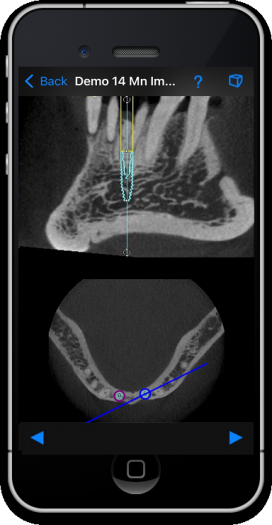
Implant Centric Images are oblique cross-sectional views that always pass through the long axis of the implant. As the oblique plane is rotated around the implant, new cross-sectional images are displayed. The implant is always at the centre of these images, so its relationship to the bone can be displayed from any angle.
Dental CT View can display a sequence of Implant Centric Images, together with the Axial to which they are related. Tap the “*” icon at the top of the screen, to the right of the filename, to enter Implant Centric mode. This icon will be greyed out or missing if there are no Implant Centric Views in the patient dataset.
You can navigate through the Implant Centric Images as follows:
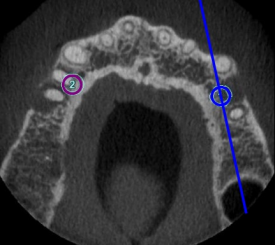
- With the Blue Line - by rotating the blue line around the implant on the axial image you can adjust the implant-centric view to match the corresponding section across the axial slice.
- With the Blue Arrows - you can step to the next implant-centric image (increasing or decreasing the angle) by using the left and right arrows on the bottom toolbar.
- Return to Panoramic - tap the “< Back” button (top left hand corner) to go back to the panoramic and cross-sectional views.
Zooming the images
- Use the pinch gesture on the implant-centric image to zoom it in or out. Double tap swaps between the zoomed and un-zoomed image, and back again.
- Pan the images by dragging with one finger (use two fingers in 3D mode). Double-tapping with one finger resets the zoom and centres the image.
Switching to a different implant
- Tap the implant on the axial image to select it. The blue line can then be rotated around the selected implant, and the corresponding implant-centric images will be displayed.
3D Views

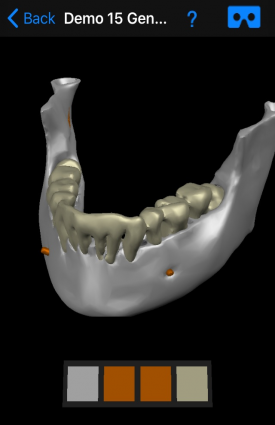
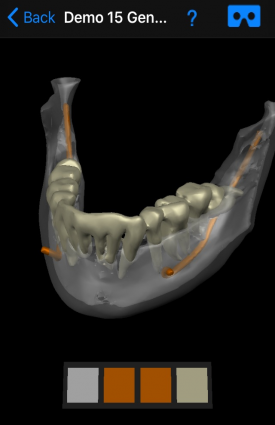
- Enter 3D Mode by tapping the icon at top of the screen, to the right of the file name. This icon will be greyed out or missing if there are no 3D Views in the patient dataset.
- Rotate the 3D objects with one finger, and pan them with two fingers. Use the pinch gesture to change the magnification. You can reset the magnification with a double-tap.
- Use the swatch buttons at the bottom of the screen to change the transparency of the 3D objects, or make them disappear altogether.
Stereo Views
- Enter Stereo Mode by clicking the icon at the top right of the 3D screen. Stereo viewing requires a stereoscopic viewer into which your iPhone can be inserted. There are low cost stereo viewers available from a number of online suppliers.
Feedback
Please make general comments about Dental CT View on the AppStore, where others will be able to see them.
For bug reports or requests for new features, please contact us.
